Monday, 28 April 2025

Simon Says Stamp Rainbow Thanks


Hi Lovelies...

Today, I'm sharing a card I made a little while ago - it's been sitting on my desk waiting for a sentiment!  Well, as I had my Simon Says Stamp Thanks word die out for another card, I decided that I could use it on this card too - cut in gold and backed in strong pink to match the pink on the card panel.


To create the card panel, I used various Simon Says Stamp Pawsitively Saturated Ink Pads..., blending the colours with domed foam pads.  I went for rainbow colours - which I splattered with gold watercolour paint.  I then used a die that I think I got from a charity shop, that looks a bit like bubbles.  I cut it from gold cardstock, and adhered it to the side of the card.


Lastly, I added the Thanks word die and shadow - which I adhered with foam pads to give some depth.


Card Info:
Simon Says Stamp Ink Pads
Gold Watercolour Paint
Gold Cardstock
Bubble type border die (no name, sorry)
Simon Says Stamp Thanks Word Die

Sorry that this post is picture heavy - I just wanted it to show off the gold rather than looking darkish - which it often does!

Hope you like...

Hugs

Thursday, 24 April 2025

Simon Says Stamp Billow Butterfly


Hi Lovelies...

Today I'm sharing a card that I made using the gorgeous Billow Butterfly die set from Simon Says Stamp..  I diecut them from vellum that I'd coloured and glittered, and also with white cardstock. 


I created a circular backdrop for the butterflies to perch on, coloured with Distress Oxides, and splattered with paint.  Then I created the sentiment on my PC.

On my card panel, before I adhered the circle, I did a few scored lines - not easy to pick up on the photos - but lovely in real life.


Card Info:
Dies - Simon Says Stamp Billow Butterfly
MFT Pierced Circle
MFT Stitched Rectangle
Sentiment - done on PC
Distress Oxides - Speckled Egg and Bundled Sage
Watercolour Paint
Vellum and Glitter


Hope you like my card today!

Hugs

Monday, 21 April 2025

Gummiapan Blooms


Hi Lovelies...

Today I'm sharing a card that I made using dies.. there's very little colouring involved - only a little distress oxide blending on the petals.

Firstly, I diecut the Slatted Square from Craft Addiction UK onto a square stitched panel.  Then I diecut the flowers - cutting a second time from DO blended cardstock, so I could pop the coloured petals into the white outlines of the flowers.  I used some double sided sticky sheet behind the flowers so that the petals would be adhered.  I added the flowers to the card panel - and decided that there needed to be some leaves too..  this little branch from the Stamp Kitchen was just the right size.  

Lastly, I added the little 'hugs' word die and shadow - cut from glitter cardstock and then added the whole panel onto some deep purple card which shows through the aperture.


Card Info:
Dies:
Craft Addiction UK Slatted Squares
Lil' Inkers Stitched Square
Gummiapan Blooms
Stamp Kitchen Mini Branch
Hugs Word
Distress Oxides - Shaded Lilac and Dusty Concord
Glitter Card

Hope you like my card today!

Hugs...

Thursday, 17 April 2025

Simon Says Stamp Birthday Wishes


Hi Lovelies

I very simple card from me today..  but it's the first time I've used Distress Oxide Sprays...  and I like the effect!  

I chose to use Picked Raspberry, with a tiny bit of Saltwater Taffy for my background, spraying it liberally with the colours.  Then all I did was cut it with a stitched rectangle die and add it to my base.  I diecut a stitched, scalloped frame, and then use the Birthday Wishes die from Simon Says Stamp out of gold cardstock with a white shadow.  Lastly I added a few little diecut stars around the sentiment.


Card Info:
Dies - Simon Says Stamp Birthday Wishes, 
MFT Stitched Scalloped Rectangle Frame, 
MFT Stitched Rectangle, Tiny Stars
Distress Oxide Sprays

I think the spray effect looks good, and I was really happy how this turned out.  I'm sure I'll be using them again lots!

Big hugs

Monday, 14 April 2025

Hero Arts Bees and Flowers


Hi Peeps...

Today I've used the lovely Hero Arts Bees and Flowers die set - which I coloured with Copics.  I've also used a Square Slatted die from the set from Craft Addiction UK.  I've backed the aperture with deep yellow card - which is also showing around the edge.  I gave the bees a little sparkle on their wings - I mean, which bee would be without any sparkle?? 


Card Info:
Dies - Hero Arts Bees and Flowers, 
Square Slatted Dies Craft Addition UK, 
Lil' Inkers Stitched Squares
Colouring - Copics
Flowers - Y17/Y38 YR24/27 B60
Bees - E49/Y17/Y38 B60
Sentiment - CC Designs Just Bee-cause
Glitter and Gems

Hope you like my make today!

Hugs

Friday, 11 April 2025

The Stamp Market Dainty Daisies 3


Hi Peeps...

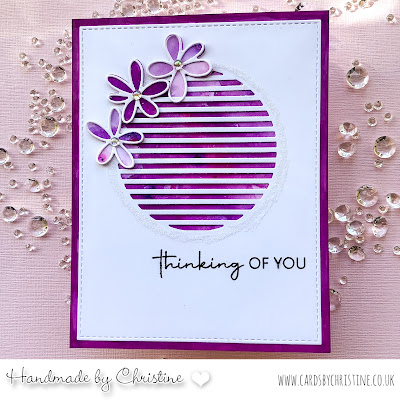
Today I have my third card this week using these gorgeous Dainty Daisies..  again with one of the slatted circle dies.  

Again I backed this one with a background that was from my 'bit box' - smooshed with Distress Oxides in shades of lilac.  I feel good using up some of my bits... to good effect!


Card Info:
Dies - The Stamp Market Dainty Daisies, Craft Addiction UK Slatted Circles,
MFT Stitched Rectangles
Sentiment - MFT
Distress Oxides - Shaded Lilac, Dusty Concord

Hope you like my card today - I promise I'll put the daisies away for a little while before I get TOO carried away!

Happy Crafting...

Tuesday, 8 April 2025

The Stamp Market Dainty Daisies 2


Hi Lovelies...

Today, I'm again using the Dainty Daisies from The Stamp Market - adding it to a background created with a fabulous die from a new UK company - Craft Addiction UK

The circle die created a slatted aperture, which I  backed with one of my 'to use' backgrounds - meaning ones that I'd smooshed or blended with Distress Oxides that were in my backgrounds box - and I also diecut the flowers with the same pre coloured card.  The white outline for the flowers is also part of the daisy die set. 


Card Info:
Dies - The Stamp Market Dainty Daisies
Craft Addiction UK - Slatted Circle Collection
Sentiment - MFT Something for Everything
Gems and Glitter

I added some glitter around the circle, and also little gems in the centres of the flowers.  Hope you like!

Now - the slatted aperture die set - I was lucky enough to get before it sold out... but they're on pre order at the moment - due in mid April.  I can't recommend the die and the company highly enough. - they are relatively new.  There are four sizes in each set - and each of those sizes has the slatted aperture and two borders.  So that's 12 actual dies in each set!

Happy Crafting...

Monday, 7 April 2025

The Stamp Market Dainty Daisies


Hi Peeps..

I saw these gorgeous daisy dies from The Stamp Market a couple of weeks back, and knew I had to have them - they're so gorgeous and perfect to add to a card.

I diecut them from white cardstock, then blended Picked Raspberry Distress Oxide onto the solid flowers, adding the white outline on top, but just glued in the centre.  I added some tiny gems in the centre of each flower.

Then I used an embossing folder on white card, adding that to my pink card base.  I adhered the daisies down one side of the embossed panel, and it was done.


Card Info:
Dies - The Stamp Market Dainty Daisies
Distress Oxide Picked Raspberry
Embossing Folder - Cuttlebug - it's an older one!

Hope you like what I made.  I love these daisies so much that you'll be seeing more cards using them from me in the next few days... watch this space!

Big hugs

Monday, 31 March 2025

AALL & Create Petal Pottery


Hi Lovelies..  

I spotted a card last week using some dies that I didn't own... well, I had to put that right, didn't I??  So the postie managed to bring me the AALL & Create Petal Pottery dies - a set of three, two of which I've used here!

For my first, I used the Ruffles for Rectangles Die (which I love!), and behind that I added a stripey embossed panel.  I diecut the image, firstly on matt rose gold card, then twice with white cardstock - adhering them together to give depth to the diecut.  I adhered the diecut to the embossed panel in the aperture.  I'd added a tiny sentiment (which I'd embossed with gold but it looks black on the photo) - and it was done.


Card Info:
Dies - AALL & Create Petal Pottery, Catherine Pooler Ruffles for Rectangles
MFT Stitched Rectangles
Sentiment - Clearly Besotted
Stripe Embossing Folder 

Now for my second card - I  used another of the dies in the same way to give depth.  This time though, I used my old crimper tool for the background... mounting that onto a rose gold card rectangle.  I adhered the vase/flower, then finally added an older sentiment (from Pink Petticoat a LONG time ago) - that I'd printed loads of years back.  I backed the sentiment again with the rose gold, so it would stand out.


Card Info:
Die - AALL & Create Petal Pottery
Corrugator/Crimper Tool
Sentiment - Pink Petticoat (no longer available)


My cards are relatively CAS - but I think with the touches of gold, they look elegant and I love how they turned out.  Hope you like them as much too!

Big Hugs

Friday, 28 March 2025

Uniko Picked Posies Fussy Cut

Hi Peeps...

For my card today, I've used the Uniko Picked Posies Stencils again, this time fussy cut after stencilling.  I was inspired by a card that Bev of Uniko made, and decided to give it a go - thanks Bev for the inspiration.

I used Distress Oxides to stencil, then spent a while cutting out the images.  I layered them on my card base to find the best way of putting them together, then adhered them with foam pads.

I added an MFT sentiment at the top, embossed with gold embossing powder, and also popped a touch of gold Stickles on the flower centres.


Card Info:
Stencils - Uniko Picked Posies
Distress Oxides
Sentiment - MFT Birdie Brown Greetings Galore
Gold Stickles

I'm  having lots of trouble lately with my photography... there either seems to be too much light, or not enough!  My cards never look the actual colour that they are - and the whites always seem to have a blue tint - especially if it's a sunny, clear day.  Hmm - maybe I need to enrol in a photography school!

Big hugs...


Tuesday, 25 March 2025

LTTS Birthday Bunny


Hi Lovelies..

Today I'm sharing this little guy and his huge birthday cake - he's from LTTS and is called Birthday Bunny.

I coloured and fussy cut the image, then created a Distress Oxide blended background, splattered with dark pink and gold watercolours.  I added a little sentiment, then a tiny shadow below the image, lastly  adhering the panel to my card base.


Card Info:
Image - LTTS Birthday Bunny
Sentiment - Paper Smooches Sentiment Sampler
Distress Oxides, Spun Sugar, Kitsch Flamingo and Picked Raspberry
Colouring - Copics
Bunny - E40/41/42/43 R20 R000
Cake - E31/33 RV52/63
Shadow and Pom Poms - T0/1

Hope you like my make today as much as I did while I was making it!

Hugs

Tuesday, 18 March 2025

LOTV Unicorns


Hi Lovelies...

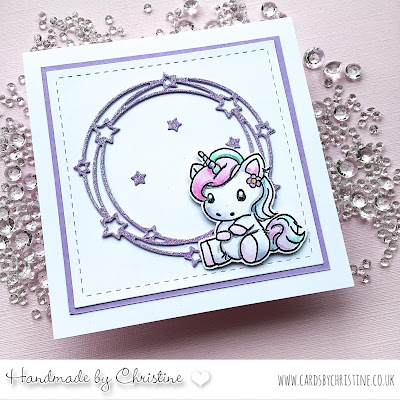
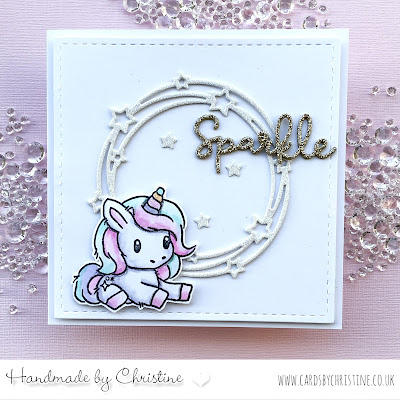
For my cards today, I've used a set from LOTV called Unicorns and Dragons... of course, Unicorns are my among my favourite of all images, so I was very happy colouring and fussy cutting these little guys!


For my first, I added a die cut circle of stars - cut from glitter card - to my card base, then matted and layered with some lilac card to give a frame.  I adhered the Unicorn with foam pads.

For second card, I've done very similar, but added the word 'sparkle' - cut with a die from Hello Bluebird stamps.


Card Info:
Images - LOTV Unicorns and Dragons Clear Stamp Set
Dies - Lil' Inkers Stitched Square, Star Circle, Hello Bluebird Sparkle word die
Colouring - Copics
BV31, R000, BG10/11, RV52
Glitter Card


Hope you like my Unicorns!

Big hugs

Sunday, 16 March 2025

Pink and Main My Little Love Bug


Hey Peeps..

I've used the gorgeous Pink and Main My Little Love Bug set again for my card today, as I loved the set so much.

I coloured and fussy cut the images, then laid them to one side while I created a stencilled background using a cloud edge stencil onto a diecut square.  I stamped the sentiment using two of the stamps from the set.  

I added glitter to the bugs' wings and the centre of the  flowers to give some sparkle.... then adhered the images onto the clouds.


Card Info:
Image and Sentiment - Pink and Main My Little Love Bug
Cloud Edge Die - MFT
Distress Oxide Tumbled Glass
Colouring - Copics
Flowers - R81/83/85 Leaves - G21/24
Bugs - E01/11/00/04 BV31 T0/1
White Gel Pen
Glitter

Hope you like my make today... I know I'll use this set often, so I've stored it at the front of my stash!

Happy Crafting...

Thursday, 13 March 2025

Pink & Main My Little Love Bug


Hi Peeps...

I've been playing with a new stamp set I bought a couple of weeks back... in fact I was waiting (impatiently!) for it's release as I'd seen cards by the Design Team and knew I wanted to use it!

It's from Pink & Main and is called My Little Love Bug - and it's totally adorable!  I've made a couple of cards, but am only sharing the first one today.

I coloured and fussy cut the images, then used an aperture die to create a shaker card with lots of sequins and glitter.. adhering the images into place over the aperture.  I'd smooshed the back panel with pink Distress Oxides to give texture. There wasn't room for a sentiment so I decided not to try to squeeze one in.. but to leave it blank.


Card Info:
Images - Pink & Main My Little Love Bug
Dies - Catherine Pooler Ruffles for Rectangles, MFT Stitched Rectangles
Distress Oxides - Spun Sugar and Kitsch Flamingo
Colouring - Copics
Pinks - R81/83 Greens - G21/24
Wings - BV31/B000
Bug - E01/00/11/04 T0/1 BV17

I really enjoyed the making of this card - you know that feeling when something you've designed turns out just how you wanted it?? THAT feeling!

Big hugs